(Last updated on January 14th, 2021)
Windows 10 is an extremely efficient operating system and runs pretty fast as is. But all that efficiency comes at a cost which, in most cases, you pay in the form of system resources.
There are many background functions and processes that run to make Windows more user-friendly and keep many apps on the stand-by for instant use.
But they may not be your requirement on a day to day basis. In this case, they end up doing more harm than good by using up valuable system resources.
So, let’s see where we can make some tweaks and apply some tricks to make our Windows even faster and more practical.
Related: 5 (Actionable) Tips to Prevent Malware Infections
1- Clear out Disk Space
Disk cleanup is as familiar as it is useful. But with the new, powerful machines that are available today with SSD drives and 1 or 2TB of Hard Disk, we might forget to benefit from this tool.
Disk Cleanup does double duty by enhancing system performance and creating valuable space for more important data. It will remove temporary or junk files from your system, which can be a tedious task if done manually.
Follow these simple steps to do your Disk Cleanup.
Step 1: Type Disk Cleanup into the Windows Search bar and Run the app as it shows up.

Step 2: Click on Clean up system files to start the process.
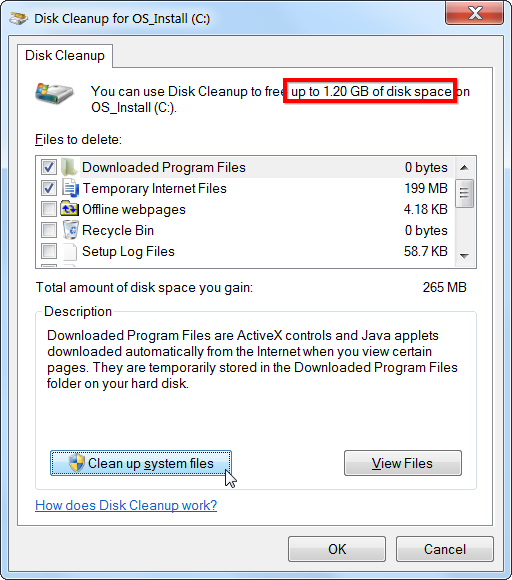
Step 3: Once the process is complete, restart your computer.
2- Save Performance not Power
Power Saving Mode is a great feature, especially when you’re outside, away from a power source, and need to conserve battery life for longer use.
But, as useful as it is, this feature also comes at the cost of system performance. So, when you’re home, try and keep your laptop plugged in, and your Windows will perform better.
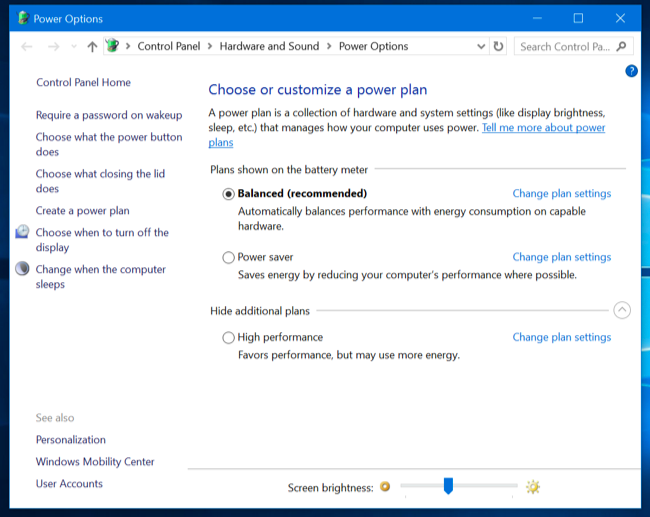
Here’s how you can turn off power saving:
Step 1: Open Control Panel and select Hardware and Sound.
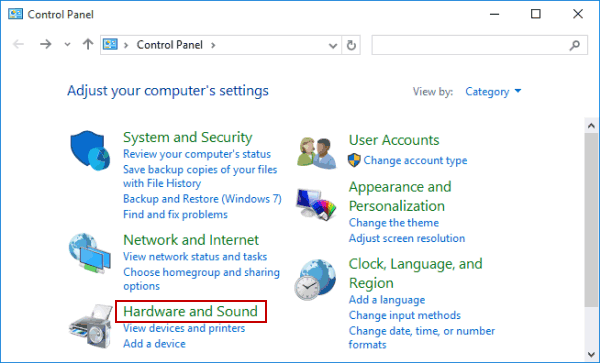
Step 2: Go into the Power Options. Choose Balanced or High-Performance as your power plan.
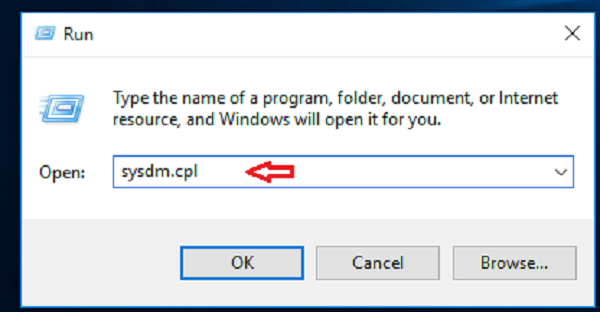
3- Take away some of your Windows’ Beauty
Windows 10 looks pretty awesome for all its visual effects and mesmerizing animations. But all of these aesthetics cost you their share of system resources.
That’s why if system performance is your preference over apparent beauty, it’s a good idea to turn some of those features off. A few simple steps will get it done for you.
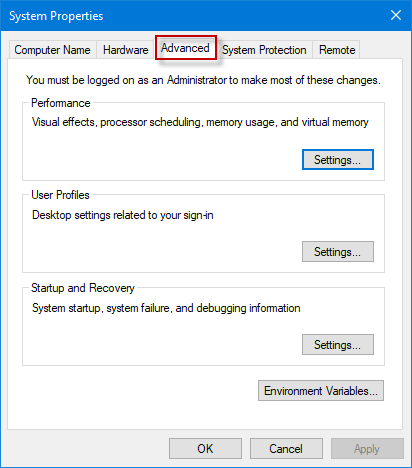
Step 1: Type in sysdm.cpl into the Windows Search Bar and press Enter.
Step 2: In the window that opens, click the Advanced tab and then click Settings in the Performance section.
Step 3: A pop-up window will display Performance Options containing a varied list of graphic effects.
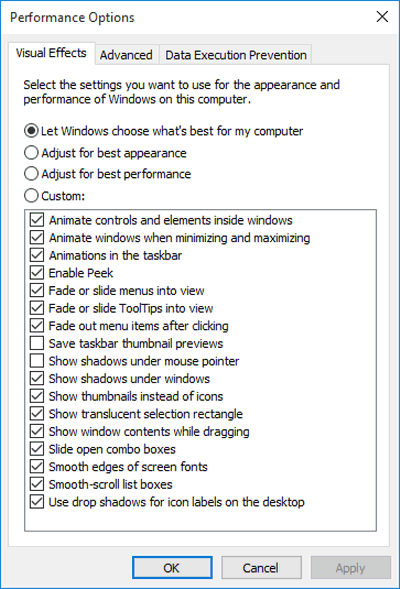
Step 4: You can choose and uncheck the features you can live without. Alternatively, you can also select Adjust for best performance from the options on the top. If you choose this option, Windows will automatically disable the effects that slow down your computer.
4- Shut Off Unnecessary Startup Programs
In a bid to enhance the user experience, Windows 10 opens up several programs right away as soon as you start your computer. The purpose is to make these programs readily available to the user. But you wouldn’t use many of these programs daily.
So, instead of doing much good, they end up dragging the system performance. But don’t worry, that can easily be fixed. All you have to do is this:
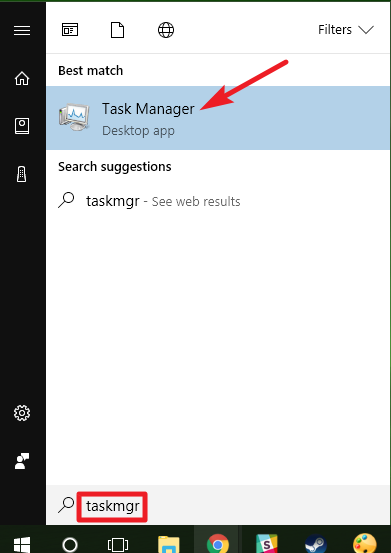
Step 1: Open Task Manager. You can launch it using the Windows Search bar or keyboard shortcut Ctrl+Shift+Escape.
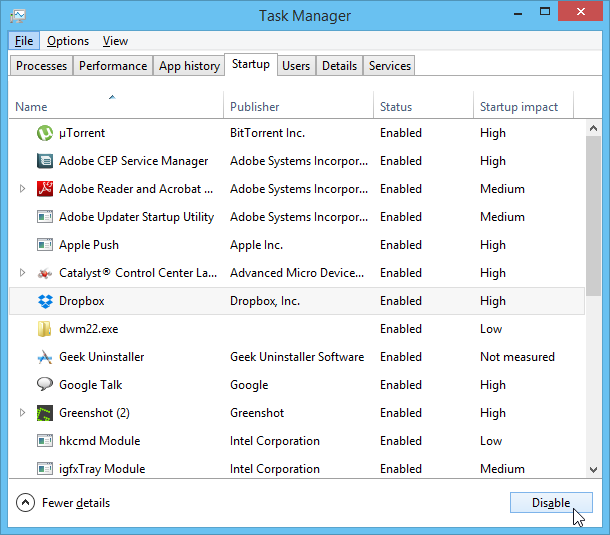
Step 2: Click on Startup from the top menu. The window will show you a list of all the processes that run as you start the Windows. Choose the programs you don’t need to open at the startup, right-click each of them, and select Disable.
5- Shush the Windows
We all know what unnecessary advice sums up to. Something like that is the case with the Windows tips and suggestions.
As you use your PC, Windows keeps a close eye on what you’re doing and generates suggestions about what you might want to do further or how you might change the settings to get the most out of your operating system.
While it sounds nice, it rarely ever helps. But if this feature is enabled, it does have an impact on system performance. So, here’s how you can tell the Windows to stop giving you advice.
Step 1: Open Start Menu and go to Settings.
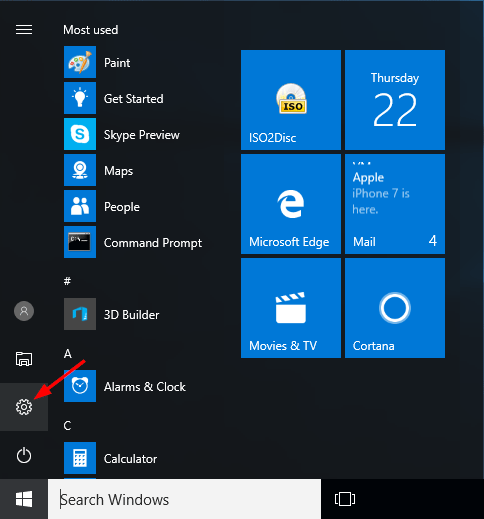
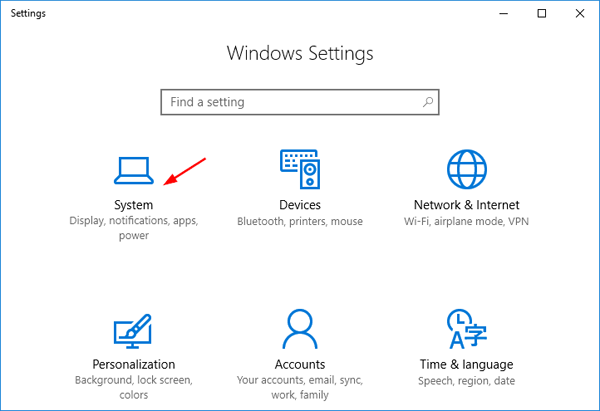
Step 2: In the Setting Window, select System and then Notifications & actions.
Step 3: Uncheck Get tips, tricks, and suggestions as you use Windows.
6- Troubleshooter to the Rescue
What this is, is simply asking the Windows to help you chuck out the data, shortcuts, and processes that you don’t even use or at least not regularly. Windows Help Center will identify all the surplus activities that slow down your system speed in the blink of an eye.
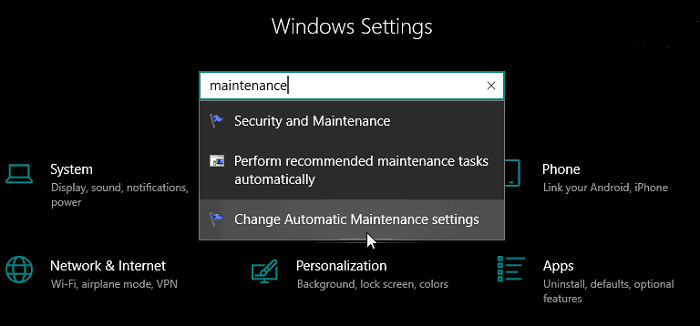
Step: Type Maintenance Tasks into the Windows Search bar and Run the app.
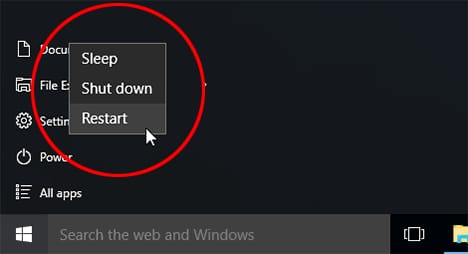
7- Restart Your Device Often
There’s much more to good old “Restart” button then we ever expect. But it does help with the system performance as well.
Restarting your system will clear out its memory, stop unnecessary processes, and give you a fresh start as you gear up to work on your computer. Remember that this is not the same as shutting down your device.
Windows 10 has a function called Fast Startup, which takes a snapshot of your computer and running processes and saves it in a system file. Windows then uses it later when you turn it on again for a faster boot-up. In this case, the memory doesn’t wipe out entirely of the processes from last use.
However, “Restart” isn’t affected by this function. So, the only way to completely shut down those processes is to restart your computer.
Bonus Tip
Here’s a bonus tip for you, just because we felt like treating you today… It’s called ‘Dust of Your Registry’.
The Registry is like a warden in the Windows operating system that keeps track of everything that goes on around the system. From the information about programs and the files required to store or open them to the smallest bit of data.
The problem is that even if you uninstall a program, its files or settings may still be there in the Registry as they don’t always get cleaned up with the uninstallation process. As a result, over time, the Registry builds up mounds of useless, outdated information that is not required by the system anymore.
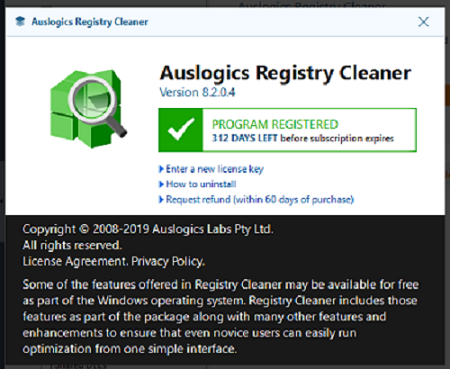
However, you cannot clean it up yourself. You need a tool to perform this function like CCleaner or Auslogics Registry Cleaner. However, it’s a good idea to back up your Registry before you go about cleaning it, just in case you need to restore it later on.
Your registry cleaner will also create a back-up copy, but it is safer to have your own as well. So, here’s how you can back up your Registry.
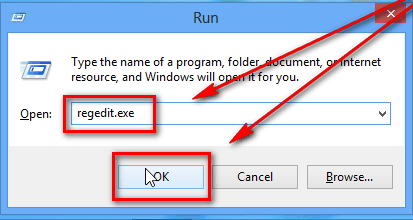
Step 1: Type regedit.ext in the search box, and press Enter.
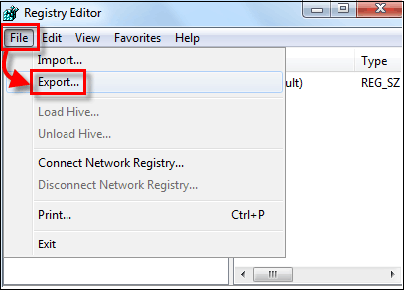
Step 2: Select Export from the File menu. Next select All in the “Export range section”, which you’ll find at the bottom of the screen.
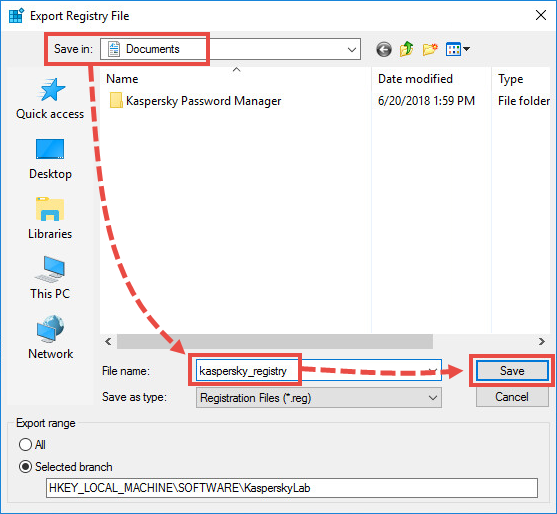
Step 3: Select a File location and name and click Save.
Note: If you find the need to restore the Registry, you can do so by opening the Registry Editor and importing the registry file you saved from the File menu.
Now, follow these steps to clean up the Registry.
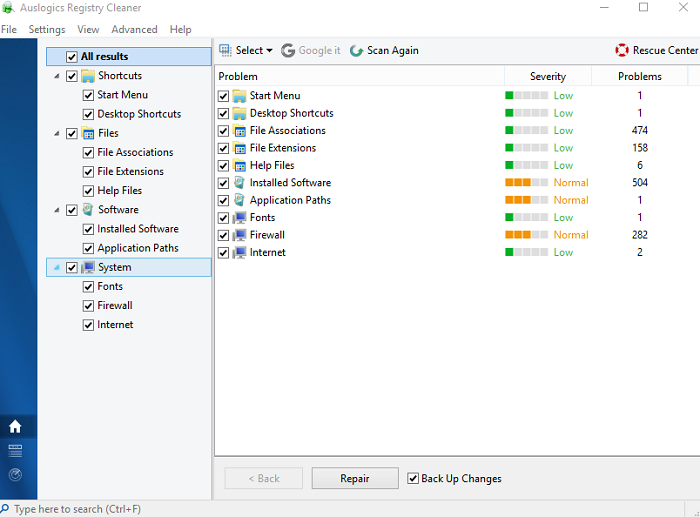
Step 1: Download and run a Registry cleaner like Auslogics Registry Cleaner. In this particular cleaner, you’ll find different Registry issues you might want to clean up itemized on the left-hand side of the screen, such as File Extensions, Installed Software, Internet, etc. You can check some or all of them.
Step 2: Have the tool scan the Registry for problems. Click on Scan Now and select Scan in the drop-down menu. It will show you a list of errors with their severity level listed against them. You can choose which problems to fix.
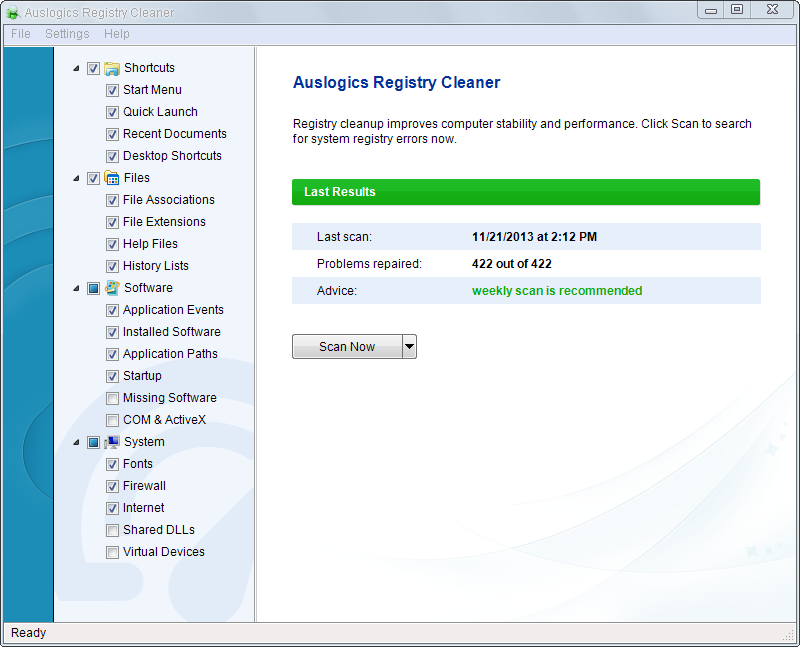
Step 3: Click Repair and make sure to check the Back-Up Changes box. This will help restore the Registry if anything goes wrong.
Step 4: Alternatively, you can select Scan and Repair, in which case the tool will make the fixes without you having to select them manually.