(Last updated on January 14th, 2021)
Wondering how to uninstall, disable, or turn off McAfee? You have come to the right place!
McAfee is one of the most popular and reliable antivirus programs out there. It not only comes with a lot of advanced features, but it also offers excellent malware protection and pricing options.
However, if you are using McAfee or your device came pre-installed with one of McAfee’s antivirus suites, but now you want to switch to some other antivirus program for any reason, it’s always safe to first uninstall the existing software before going ahead.
In this article, we will guide you through the process of uninstalling McAfee from your Windows and Mac devices.
Related: 7 Tips & Tricks to Make Your Computer Run Super Fast
Uninstalling McAfee from Windows
Below are the steps to uninstall McAfee from different Windows operating systems (Windows 10, Windows 8 and Windows 7).
Uninstall McAfee in Windows 10
- From the Start menu, click the gear-shaped Settings icon located on the lower left side of the menu. (You can also access Settings by typing its name in the Windows search bar.)

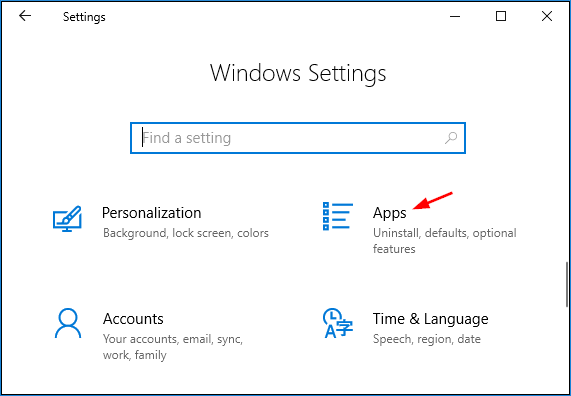
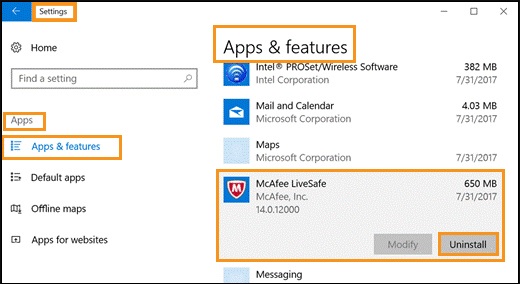
- In the Settings section, click Apps to see the list of all the apps installed on your device.
- From there, locate the McAfee product installed on your PC, or find it using the search box under the ‘Apps & features’ and press Enter.
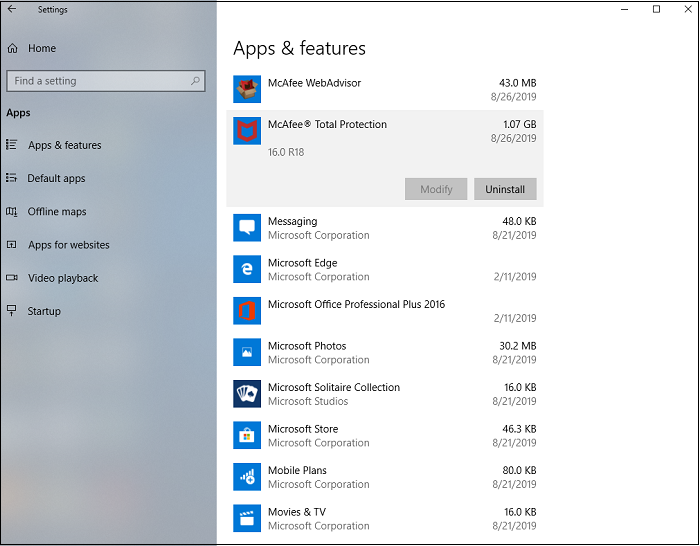
- Select the McAfee product you want to remove and click the Uninstall button shown below it.
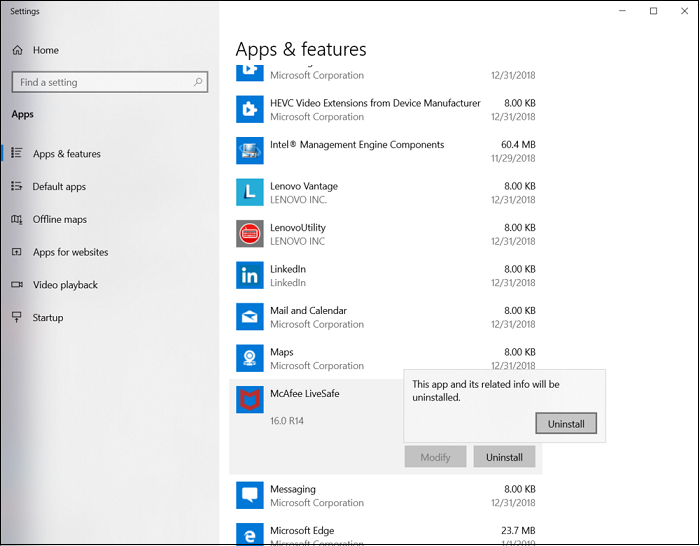
- If prompted for confirmation, click Uninstall
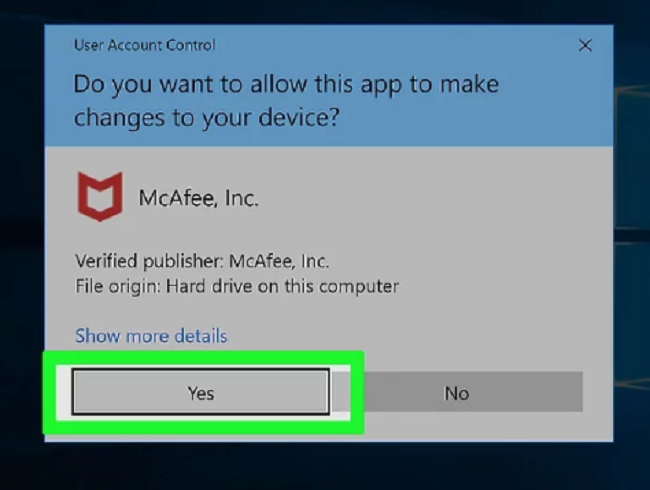
- Windows will prompt a request for verification. Click This will take you to the McAfee uninstall wizard.
- Once the uninstall wizard is open, check the following boxes:
□ McAfee® Total Protection box
□ Remove all files for this program
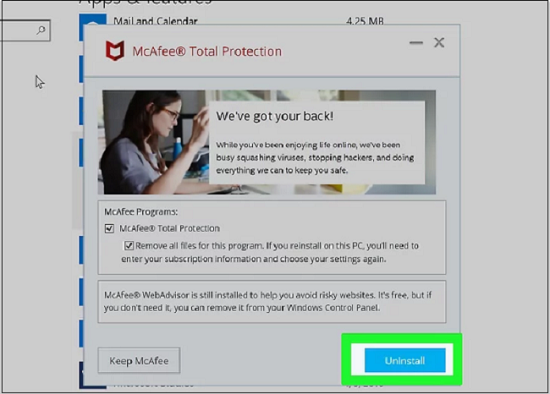
- Then click the Uninstall Click Uninstall again if prompted.
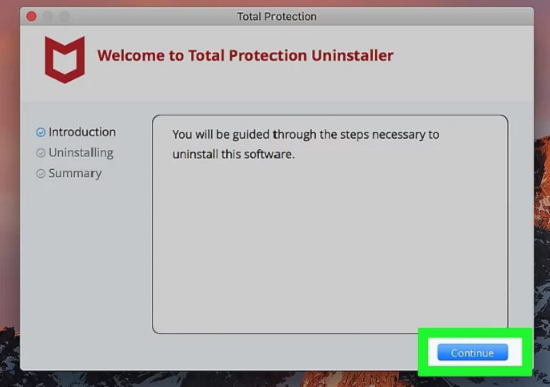
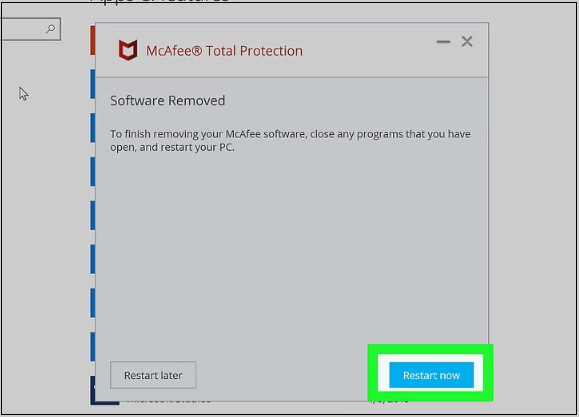
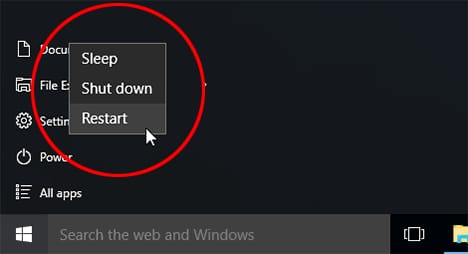
- Restart your device to complete the uninstallation process.
Uninstall McAfee in Windows 8
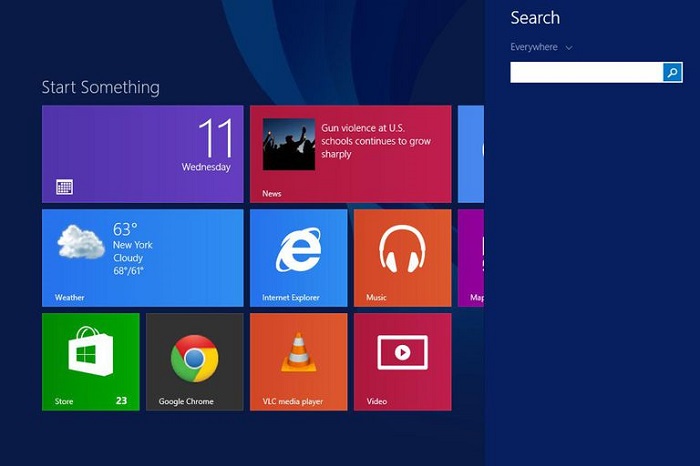
- Press Windows Key or click Start in the Charms bar to access the programs installed on your computer.
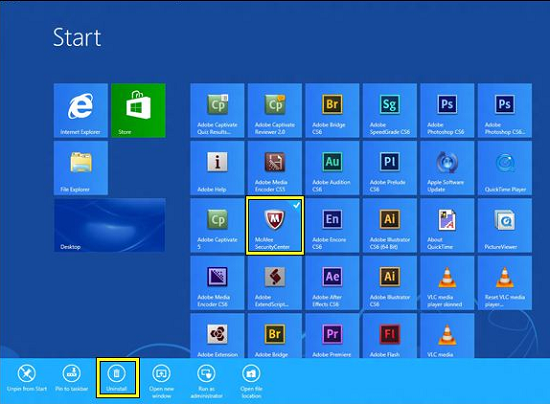
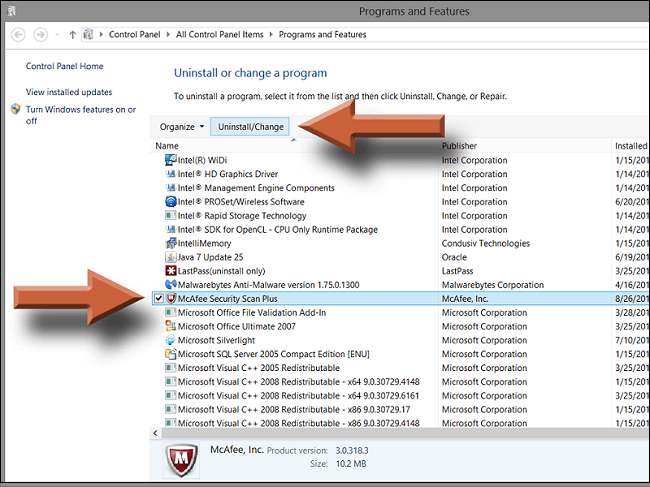
- Right-click the McAfee software you want to remove and click Uninstall. The Programs and Features window will open.
- When the new window pops up, once again select the McAfee product you don’t want in your PC.
- Click the Uninstall/Change button.
- Click Uninstall again for confirmation.
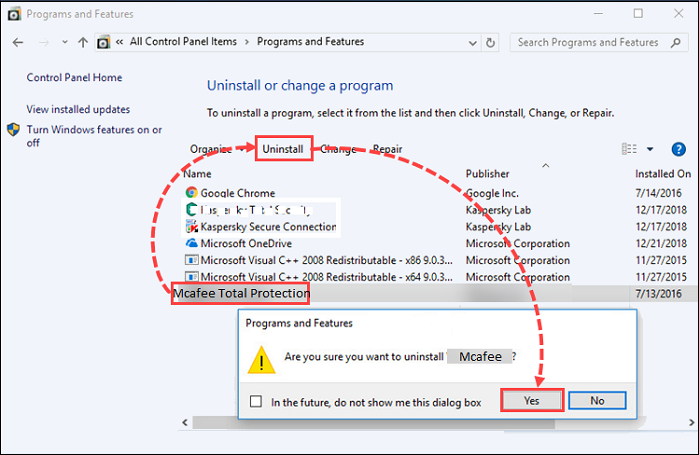
- Click Yes if Windows asks for your permission before making changes to your computer.
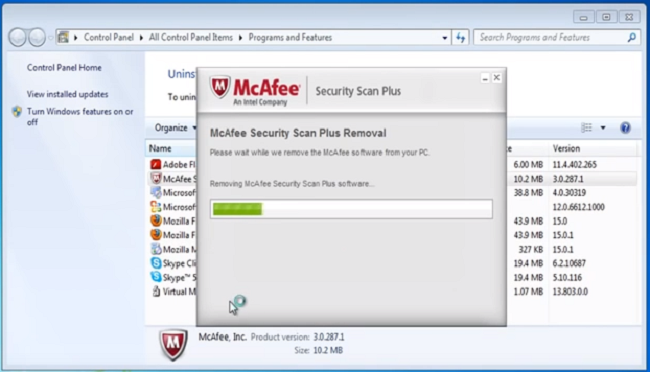
- Wait for the uninstallation to complete and then close the Programs and Features window.
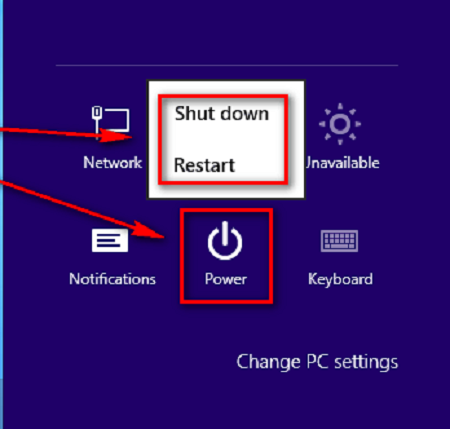
- Restart your computer to apply the new changes to your device.
Uninstall McAfee in Windows 7
- Go to the Start menu and open Control Panel.
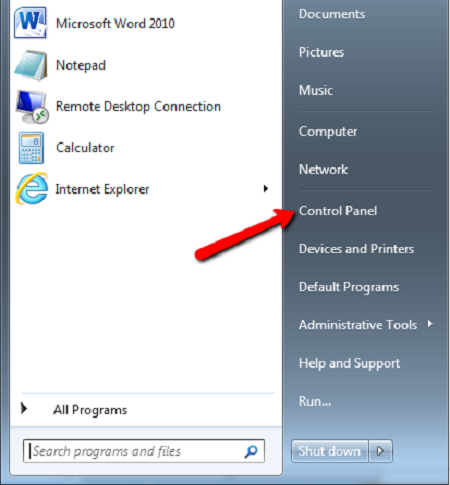
- Find Add or Remove Programs and double-click it to open.
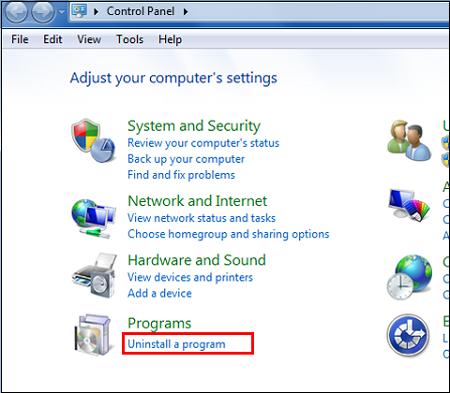
- Click on the McAfee product you want to remove.
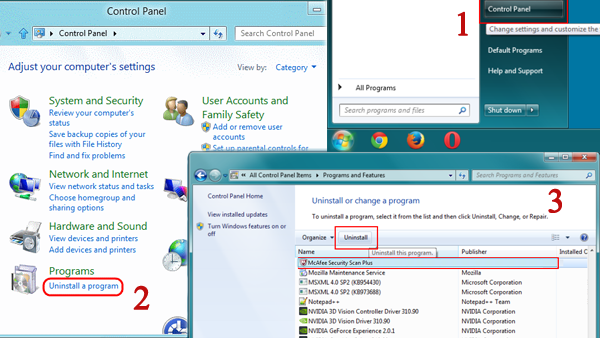
- Look for Add/Remove or Change/Remove button and click on it.
- Next, click Remove.
- If prompted by Windows for your permission, click Yes.

- Let the uninstallation wizard do its work and follow on-screen instructions. Close the window when the process is complete.
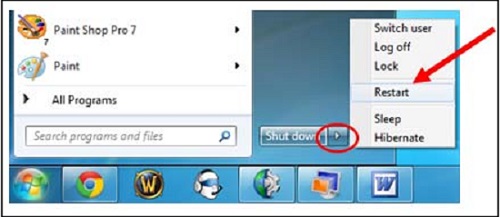
- Finally, Restart your PC to apply new changes.
Uninstall Using McAfee Removal Tool
The above-mentioned steps of removing McAfee are quite simple. However, sometimes this uninstallation process doesn’t do the job for you and some elements of the software remain inside your PC. Uninstallation can also become a little tricky if McAfee came pre-installed with your PC.
In this case, you can use the McAfee Removal Tool to completely remove the antivirus from PC. Below are the steps that can help you in completing the task:
- Download the McAfee Consumer Product Removal (MCPR) tool from McAfee’s official website.
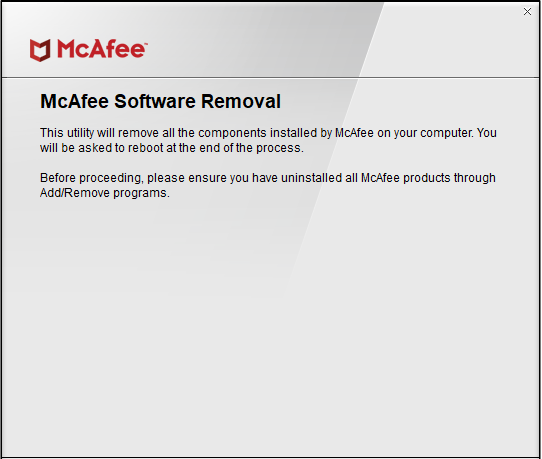
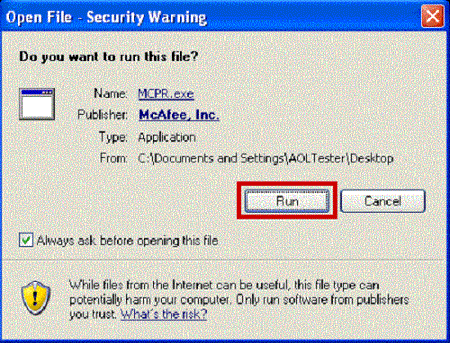
- Next, double-click the downloaded file (MCPR.exe) and click Run/Continue to open the tool.
- Click Next on the window that pops up.
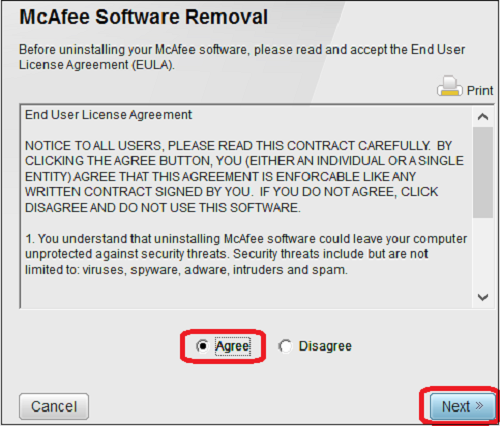
- Accept the End User License Agreement (EULA).
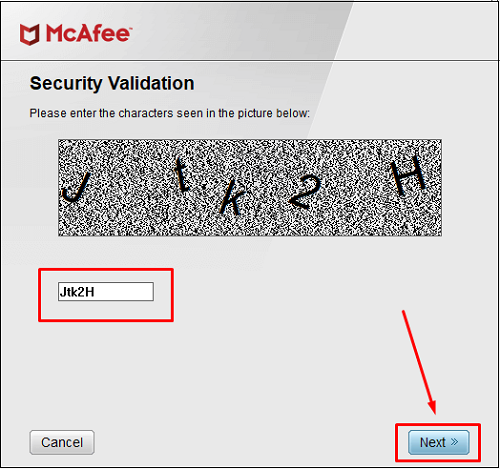
- Then, carefully type the security CAPTCHA code as requested and click Next.
- Wait until the process is complete, which might take a few minutes.
- Restart your PC so that new changes take effect.
Uninstalling McAfee from Mac Devices
The following are the couple of methods that will help you to remove McAfee from your Mac devices.
Uninstall McAfee Using Application Method
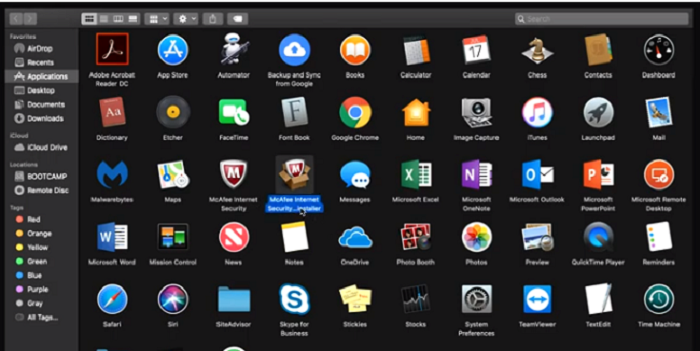
- Search for the Applications folder in the dock and open it.

- Open the McAfee Internet Security Uninstaller app.
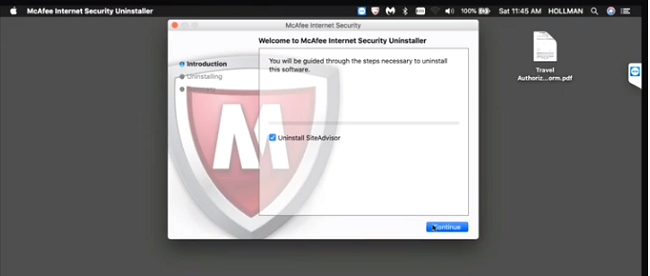
- Select the Uninstall SiteAdvisor option and click Continue.
- Enter your Administrator ID and password and click OK.

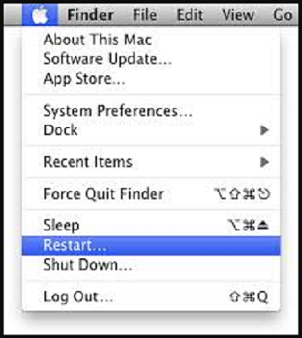
- When you’re done with these steps, Restart your device to apply new settings.
Uninstall McAfee Using Command Method
- Open Spotlight by clicking on the magnifying glass icon located at the top-right corner of the screen. A search bar will open.
- Access the Terminal app by typing its name in the search bar.
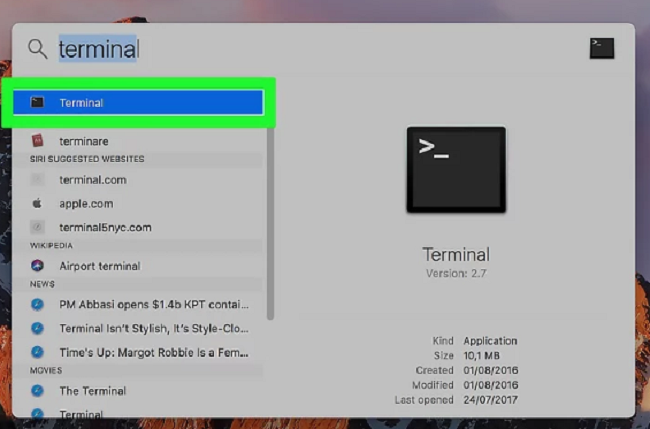
- Type or copy-paste the following Uninstall Command in the Terminal window:
sudo/Library/McAfee/cma/scripts/uninstall.sh
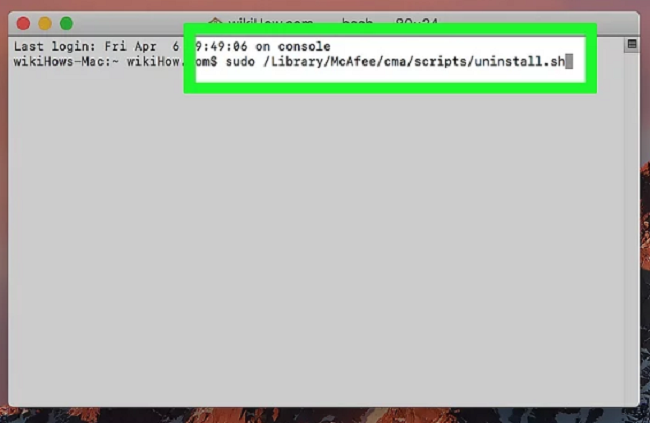
- Press Return.
- If prompted a request by the system, enter your Administrator password and press Return.
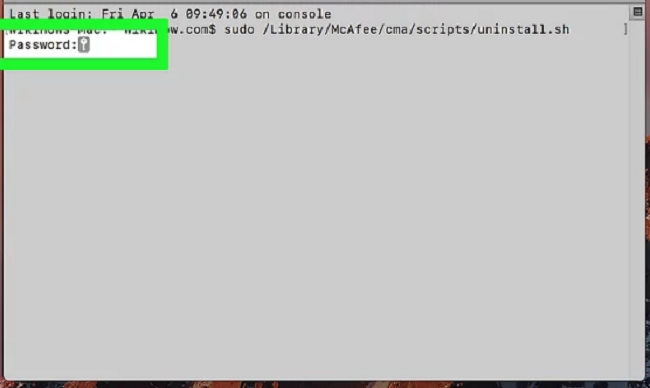
- Confirm that you do want to uninstall the McAfee product when received a prompt for approval.
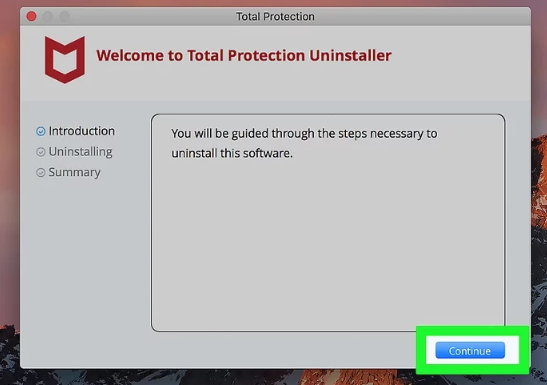
- Wait for the uninstallation process to finish and then Restart your computer to complete McAfee’s removal from your Mac.

Related: 5 (Actionable) Tips to Prevent Malware Infections
McAfee Uninstalled!
You can use the above methods to uninstall any McAfee home antivirus program from your computer. However, after uninstalling McAfee (or any other antivirus program for that matter), it is highly recommended that you install another antivirus program as soon as possible to protect your computer from all sorts of digital threats.


